Have you seen Amy's post (and link-up) about her Quilty Secrets?
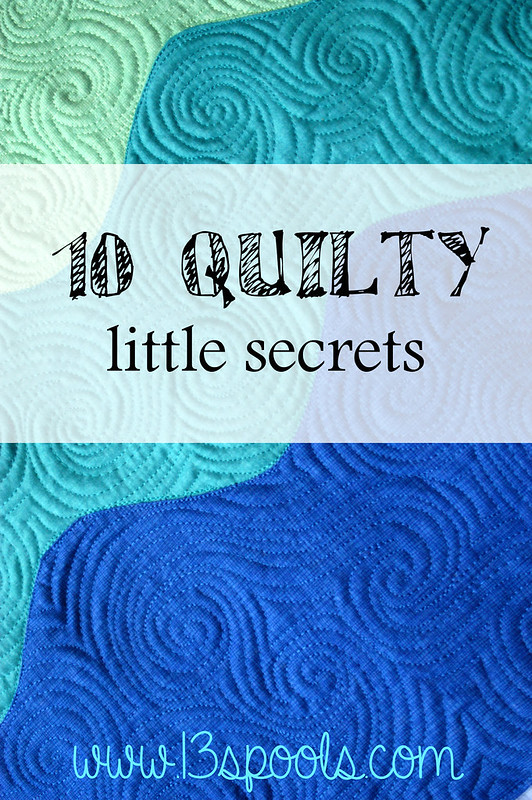
It got me thinking, and without further ado, here are my top 10 "Quilty Secrets:"
1. I rarely pin. But after reading a few other "Quilty Secret" lists, I would say this is more like the norm (well, either that or sewing over pins). :)
2. I do most of my cutting with my cutting board on my ironing board or on the floor. I think I'm supposed to use a hard surface or something?
3. Not really a fan of Cotton+Steel. Or Liberty. Or Aneela Hoey. SORRY!! I've also never really been a fan of scrap quilts.
4. Sometimes I let the twins scatter my buttons all over my sewing room just so I can have a few extra minutes of sewing time. Not to mention the fact that letting them watch a few episodes of Dora or Blues Clues every day is becoming alarmingly more common. I used to try so hard to limit my sewing time to times when they were NOT awake. And I feel guilty letting them watch so much TV. But as they get older and take fewer naps (almost none now), it's just SO HARD. Sometimes I just have to be a bad mom for an hour or so. ;) It's for my sanity.
5. I don't really like the post-wash crinkly look. I prefer flat an crisp and I don't like the way washing my quilts changes the way the quilting looks.
6. I press open 90% of the time. I had a couple of ladies freak out about this once at a sewing night (I was even pressing my HSTs open - gasp!) so I have tried pressing to the side a few times since. It works okay for me, but I just can't quite get the hang of it. Also, I love ironing.
7. I don't really have UFOs. I prefer to finish things completely before starting new things. My to-do list, on the other hand, is quite another story...
8. Rotary blades and needles - changing them is like pulling teeth. I don't have a problem cleaning out my machine every now and then, but that's because I do that for free.
9. I've tried machine stitching binding and was convinced for awhile that it was the way to go because it's so fast. Then I learned how to stitch binding by hand and realized how much better it looks (at least, compared to MY machine binding). Now I hand bind EVERYTHING and I love it.
10. Sometimes I use polyester batting. I know. It's really not as bad as others make it seem. :)
Now how about you? What are your "Quilty Secrets?"
Wanna see some more? Check out the link-up HERE.
Tuesday, August 26, 2014
Monday, August 25, 2014
New Quiet Book: ABCs!
This quiet book has been in the works for a REALLY long time. I probably started sketching ideas for it a year ago. I love making these, and since we already have a Shapes and Colors one, it was time to make a Letters one too! I wanted one page for each letter of the alphabet, with a coordinating and interactive item on each page. What do you think?
With 26 pages, it turned out SUPER FAT, so I added a little strap to keep the thing closed.
And these are a few of my favorites:
I even made this pocket for the back using some faux leather I acquired. :)
So. Another reason for creating this ABC book was so that I could list some personalized name books in my shop. I took all the appropriate letters from the ABC book to make a little book for my boys. As it happens, most of the letters in their name ended up red or blue and I didn't really want to make them all over again...
Luckily, their little cousin just turned two so I got to make a new one with more color variety. ;)
I had to get a little creative, because Connor has two repeated letters in his name. In fact, while I was at it I came up with alternate ideas for nearly every letter and included them in my shop listing - just in case I run into this problem again. ;)
Whew!
You can find all of my quiet books in my shop HERE. I think now I need to work on a numbers book, or maybe just some fun pages for custom books like the one I did for Henrik. So many ideas!!!!
BONUS. This project was #11 on my Quarter 3 Finish-Along list. Linking up here:
With 26 pages, it turned out SUPER FAT, so I added a little strap to keep the thing closed.
Here are all of the pages before they were sewn up into the book:
And these are a few of my favorites:
I even made this pocket for the back using some faux leather I acquired. :)
So. Another reason for creating this ABC book was so that I could list some personalized name books in my shop. I took all the appropriate letters from the ABC book to make a little book for my boys. As it happens, most of the letters in their name ended up red or blue and I didn't really want to make them all over again...
Luckily, their little cousin just turned two so I got to make a new one with more color variety. ;)
I had to get a little creative, because Connor has two repeated letters in his name. In fact, while I was at it I came up with alternate ideas for nearly every letter and included them in my shop listing - just in case I run into this problem again. ;)
| N is an especially hard letter to come up with ideas for, believe me. But I think the numbers turned out pretty cute. |
| The octopus turned out ADORABLE! So much cuter in person. |
Whew!
You can find all of my quiet books in my shop HERE. I think now I need to work on a numbers book, or maybe just some fun pages for custom books like the one I did for Henrik. So many ideas!!!!
BONUS. This project was #11 on my Quarter 3 Finish-Along list. Linking up here:
Tuesday, August 12, 2014
Rummy Royal IV
I made another Rummy Royal mat. This one is #4. You can see #2 and #3 HERE. #1 is HERE.
I was talking with the hubby awhile ago about how it's hard to sell quilts on Etsy because there are just so. freaking. many of them out there. You really have to have a unique product in order to be successful on Etsy. Hence the reason I get tons and tons of views on my quiet books every day (well, maybe not TONS), but hardly any on my quilts or quilted growth charts!
He very ingeniously suggested that I sell my Rummy Royal mats. They are definitely unique, wouldn't you say? The design is completely my own (are ya'll interested in a pattern/tutorial?) and I've never seen anything like it before. Can you believe that my first Rummy Royal post is the fifth most viewed post of all time on my blog? (1-4 are giveaways and bloggers quilt festival posts.)
So I made another one, this time in more traditional black and red fabrics with a totally awesome card print on the back. What do you think? I even printed the official rules and sewed them into the backing! Plus, (at hubby's suggestion - isn't he great?) I added some ribbon so that it can be rolled up and tied for easier storage and transportation. :)
It's listed in my Etsy shop HERE.
Also, the hubby suggested I list the stockings I've been making for our family. I have always loved to cross-stitch and created these individualized stockings for us. We'll see if anyone else likes them as much as he does. :) They can be found HERE.
I was talking with the hubby awhile ago about how it's hard to sell quilts on Etsy because there are just so. freaking. many of them out there. You really have to have a unique product in order to be successful on Etsy. Hence the reason I get tons and tons of views on my quiet books every day (well, maybe not TONS), but hardly any on my quilts or quilted growth charts!
He very ingeniously suggested that I sell my Rummy Royal mats. They are definitely unique, wouldn't you say? The design is completely my own (are ya'll interested in a pattern/tutorial?) and I've never seen anything like it before. Can you believe that my first Rummy Royal post is the fifth most viewed post of all time on my blog? (1-4 are giveaways and bloggers quilt festival posts.)
So I made another one, this time in more traditional black and red fabrics with a totally awesome card print on the back. What do you think? I even printed the official rules and sewed them into the backing! Plus, (at hubby's suggestion - isn't he great?) I added some ribbon so that it can be rolled up and tied for easier storage and transportation. :)
It's listed in my Etsy shop HERE.
Also, the hubby suggested I list the stockings I've been making for our family. I have always loved to cross-stitch and created these individualized stockings for us. We'll see if anyone else likes them as much as he does. :) They can be found HERE.
Tuesday, August 5, 2014
Building Fun!
I have another quilt finish to share!
This one is my Building Fun quilt. I tried to think of a unique name for it, but the pattern is already named "Building Fun," and that's what stuck in my brain. So, here it is. Building Fun:
I made this quilt mostly because I wanted to. I didn't have any real plans for it, other than to maybe list it in my Etsy shop.
The fabrics are Textured Basics, by Patti Young and I won them in a giveaway, which is awesome. (Hi, Lethargic Lass!)
The pattern is by Geta Grama and can be found HERE. It's one of the first patterns I pinned on Pinterest and I finally had to break down and make it. Actually, it's the only quilt pattern I've ever purchased and followed. (That should show you how much I love it). Normally I prefer to be inspired by others and design my own stuff.
It was really relaxing to sit and quilt this with a basic stipple. And SO FAST! Also, it washed up really well. As much as I love unique custom-style FMQ, I should really do this more often.
For the back, I pieced together all of my leftovers with a bunch of white.
The binding is this green dotty vines. I'm not sure where it came from, but it was the best match from my stash of big cuts, so I went with it. I think it works. Of course, it is hand stitched. :)
In the end, I did decide to list this one in my Etsy shop. You can find it HERE.
Of course, I had to have a little bit of fun photographing it using the twins' building blocks. :)
I even remembered to add a label! I kept it very small and simple, since this quilt will hopefully be sold someday to someone I probably don't know.
This was so much fun to make! Now, on to the next project!
This is project #4 from my Q3 Finish Along List. (Mine was linky #42) Wahoo!
This one is my Building Fun quilt. I tried to think of a unique name for it, but the pattern is already named "Building Fun," and that's what stuck in my brain. So, here it is. Building Fun:
I made this quilt mostly because I wanted to. I didn't have any real plans for it, other than to maybe list it in my Etsy shop.
The fabrics are Textured Basics, by Patti Young and I won them in a giveaway, which is awesome. (Hi, Lethargic Lass!)
The pattern is by Geta Grama and can be found HERE. It's one of the first patterns I pinned on Pinterest and I finally had to break down and make it. Actually, it's the only quilt pattern I've ever purchased and followed. (That should show you how much I love it). Normally I prefer to be inspired by others and design my own stuff.
It was really relaxing to sit and quilt this with a basic stipple. And SO FAST! Also, it washed up really well. As much as I love unique custom-style FMQ, I should really do this more often.
For the back, I pieced together all of my leftovers with a bunch of white.
The binding is this green dotty vines. I'm not sure where it came from, but it was the best match from my stash of big cuts, so I went with it. I think it works. Of course, it is hand stitched. :)
In the end, I did decide to list this one in my Etsy shop. You can find it HERE.
Of course, I had to have a little bit of fun photographing it using the twins' building blocks. :)
I even remembered to add a label! I kept it very small and simple, since this quilt will hopefully be sold someday to someone I probably don't know.
This was so much fun to make! Now, on to the next project!
This is project #4 from my Q3 Finish Along List. (Mine was linky #42) Wahoo!
Thursday, July 31, 2014
ABC Book Sneak Peak
Hi Friends!
I just wanted to drop in and show you a couple sneak peaks of the new quiet book I am working on. I just need to take a few more pictures and fix a few of the pages, then it will be ready to post!
This was my July goal for ALOYF (mine was link #25), so I wanted to get a quick post up to show that I met my goal, even if it was just under the wire...
More coming soon, plus a quilt finish!
Linking up!
I just wanted to drop in and show you a couple sneak peaks of the new quiet book I am working on. I just need to take a few more pictures and fix a few of the pages, then it will be ready to post!
This was my July goal for ALOYF (mine was link #25), so I wanted to get a quick post up to show that I met my goal, even if it was just under the wire...
More coming soon, plus a quilt finish!
Linking up!
Wednesday, July 23, 2014
Do.Good Stitches: Humilty Group Broken Herringbone
It's time to reveal my first bee quilt! I'm a little nervous about it because I went out on a limb and tried some new things with the assembly and quilting. Here we go!
First of all, for the month of May, I asked my bee mates in the Humility group of Do.Good Stitches to make me mostly monochromatic Broken Herringbone blocks. It was so much fun receiving these little packages throughout the month! They all turned out so awesome. Here they are all arranged by color on the living room floor:
I knew that I wanted to try an offset layout with half of the blocks on one side of the quilt and half on the other. After lots of deliberation, I decided to sort the blocks into warm and cool colors.
Here is the warm side:
And here is the cool side:
What do you think? I wanted something with lots of negative space and offset blocks. I also thought this might be a genius way to try quilting "echo blocks" in the negative space. Basically, I quilted the warm colored blocks (which created the echo look on the cool colored side), then flipped the quilt around and did the same for the other side. This quilt is totally reversible, I love it.
Sandra (at least, I think it was Sandra - correct me if I'm wrong please!!), a member of our group, ordered some Do.Good Stitches labels from Spoonflower (I think?) and sent me a couple. Thanks Sandra! Since this quilt doesn't really have a back, I stuck it in the top right corner next to the greens.
For the quilting, I chose five different skinny filler patterns and quilted them in the skinny sashing of each block. My original plan was to stitch in the ditch for ALL of those little sashings, but after outlining each block I decided I really wasn't excited about the idea of all that shifting and turning, so I went with FMQ instead. And then I decided it wasn't worth it to add more quilting once those were done.
Also, after much debate I chose to use this silver/gray thread because I wanted something that would blend in with the white but still be seen on the gray. In hindsight, I think I should have used a slightly darker gray for a more subtle look in the negative space.
What do you think? Does it need more quilting? More straight lines? Different thread color?
Now, I really want to know what you guys think about this quilt! I took some risks and tried an idea that has been floating around in my head. I wanted something really modern and I think I found it. However, most of the people I have showed it to so far - mostly family members - don't really like it at all. Which is fine. This quilt is for charity - not for any of my family members, so it doesn't really matter if they like it or not. I like it, and I'm not offended at all if others don't like it. But that doesn't mean I'm not curious. What do YOU think? Love it? Hate it? Do you wish I had put all the blocks on the front? Done different quilting? Used a different background color? I'd love to know!
Truth Tea is welcome here! ;)
And just for fun, a few more shots. Thanks for humoring me!
I took these two shots in my backyard, and they look kind of cool with the sunlight shining through in spots.
And one shot of it post basting (LOVING spray baste lately), pre quilting.
This is finish #14 in this quarter's Finish-Along. (Original list can be found HERE.)
Also linking up with Kelly at Needle and Thread Thursday:

And Alyce at Sew Cute Tuesday:
And Randi at Show and Tell Tuesday:

And Lindsey at Fabric Frenzy Friday:
First of all, for the month of May, I asked my bee mates in the Humility group of Do.Good Stitches to make me mostly monochromatic Broken Herringbone blocks. It was so much fun receiving these little packages throughout the month! They all turned out so awesome. Here they are all arranged by color on the living room floor:
I knew that I wanted to try an offset layout with half of the blocks on one side of the quilt and half on the other. After lots of deliberation, I decided to sort the blocks into warm and cool colors.
Here is the warm side:
And here is the cool side:
What do you think? I wanted something with lots of negative space and offset blocks. I also thought this might be a genius way to try quilting "echo blocks" in the negative space. Basically, I quilted the warm colored blocks (which created the echo look on the cool colored side), then flipped the quilt around and did the same for the other side. This quilt is totally reversible, I love it.
Sandra (at least, I think it was Sandra - correct me if I'm wrong please!!), a member of our group, ordered some Do.Good Stitches labels from Spoonflower (I think?) and sent me a couple. Thanks Sandra! Since this quilt doesn't really have a back, I stuck it in the top right corner next to the greens.
For the quilting, I chose five different skinny filler patterns and quilted them in the skinny sashing of each block. My original plan was to stitch in the ditch for ALL of those little sashings, but after outlining each block I decided I really wasn't excited about the idea of all that shifting and turning, so I went with FMQ instead. And then I decided it wasn't worth it to add more quilting once those were done.
Also, after much debate I chose to use this silver/gray thread because I wanted something that would blend in with the white but still be seen on the gray. In hindsight, I think I should have used a slightly darker gray for a more subtle look in the negative space.
What do you think? Does it need more quilting? More straight lines? Different thread color?
| This photo turned out a little bit blue - the real quilt is more gray. |
I wanted a nice gray for my background, so I ordered a whole bunch and was half way through assembling my quilt tops when I realized I had grossly miscalculated the amount I needed! GAH! Since I was too impatient to wait for more to arrive, I went to Joanns and picked up the closest match I could find for one of the sides. They aren't exactly the same, but it's really hard to tell most of the time.
For binding, I kept things super simple for myself and just folded the "back" over onto the front and machine stitched it down. Now, I really want to know what you guys think about this quilt! I took some risks and tried an idea that has been floating around in my head. I wanted something really modern and I think I found it. However, most of the people I have showed it to so far - mostly family members - don't really like it at all. Which is fine. This quilt is for charity - not for any of my family members, so it doesn't really matter if they like it or not. I like it, and I'm not offended at all if others don't like it. But that doesn't mean I'm not curious. What do YOU think? Love it? Hate it? Do you wish I had put all the blocks on the front? Done different quilting? Used a different background color? I'd love to know!
Truth Tea is welcome here! ;)
And just for fun, a few more shots. Thanks for humoring me!
I took these two shots in my backyard, and they look kind of cool with the sunlight shining through in spots.
And one shot of it post basting (LOVING spray baste lately), pre quilting.
Quilt stats:
Started: May 2014
Finished: July 11, 2014
Pieced by: Members of the Humility Circle of Do.Good Stitches
Quilted by me
Finished size: 72" x 62"
Recipient: Pine Ridge Reservation in South Dakota
Binding: Backing folded to front and stitched by machine
This is finish #14 in this quarter's Finish-Along. (Original list can be found HERE.)
Also linking up with Kelly at Needle and Thread Thursday:

And Alyce at Sew Cute Tuesday:
And Randi at Show and Tell Tuesday:
And Lindsey at Fabric Frenzy Friday:
Subscribe to:
Posts (Atom)